Darkroom Basics - Teststrips
Making it perfect

Getting Started
In this short 'How-to' article, I am assuming that you know the basics of Black and White printing. If not, check out the following videos and websites:
When printing an image in the darkroom, how do you determine the correct exposure time? The answer is simple if you have a basic darkroom set up and involves making a test strip. It is one of the first technique you must learn to successfully print your photos. In this article, I will take you through the process to create test strips so you can nail the exposure on the journey to deliver the final print.
Equipment List
To make a test strip, you will need to have scissors and opaque card in addition to the basic darkroom equipment. Also, having a timer will certainly help, as accurate and precise exposure times are essential.
Before making the test strip
The first thing to do, under safelight conditions, is to cut a few sheets of photographic paper into strips along the width into thirds or quarters. Don't make it too thin as you don't get enough image detail to choose the best times.
Now, place them back into the light-proof box or back into the plastic photo bag and put them away.
The Process
Place your negative into the enlarger and focus it. Then close down the enlarger to second or third smallest aperture.
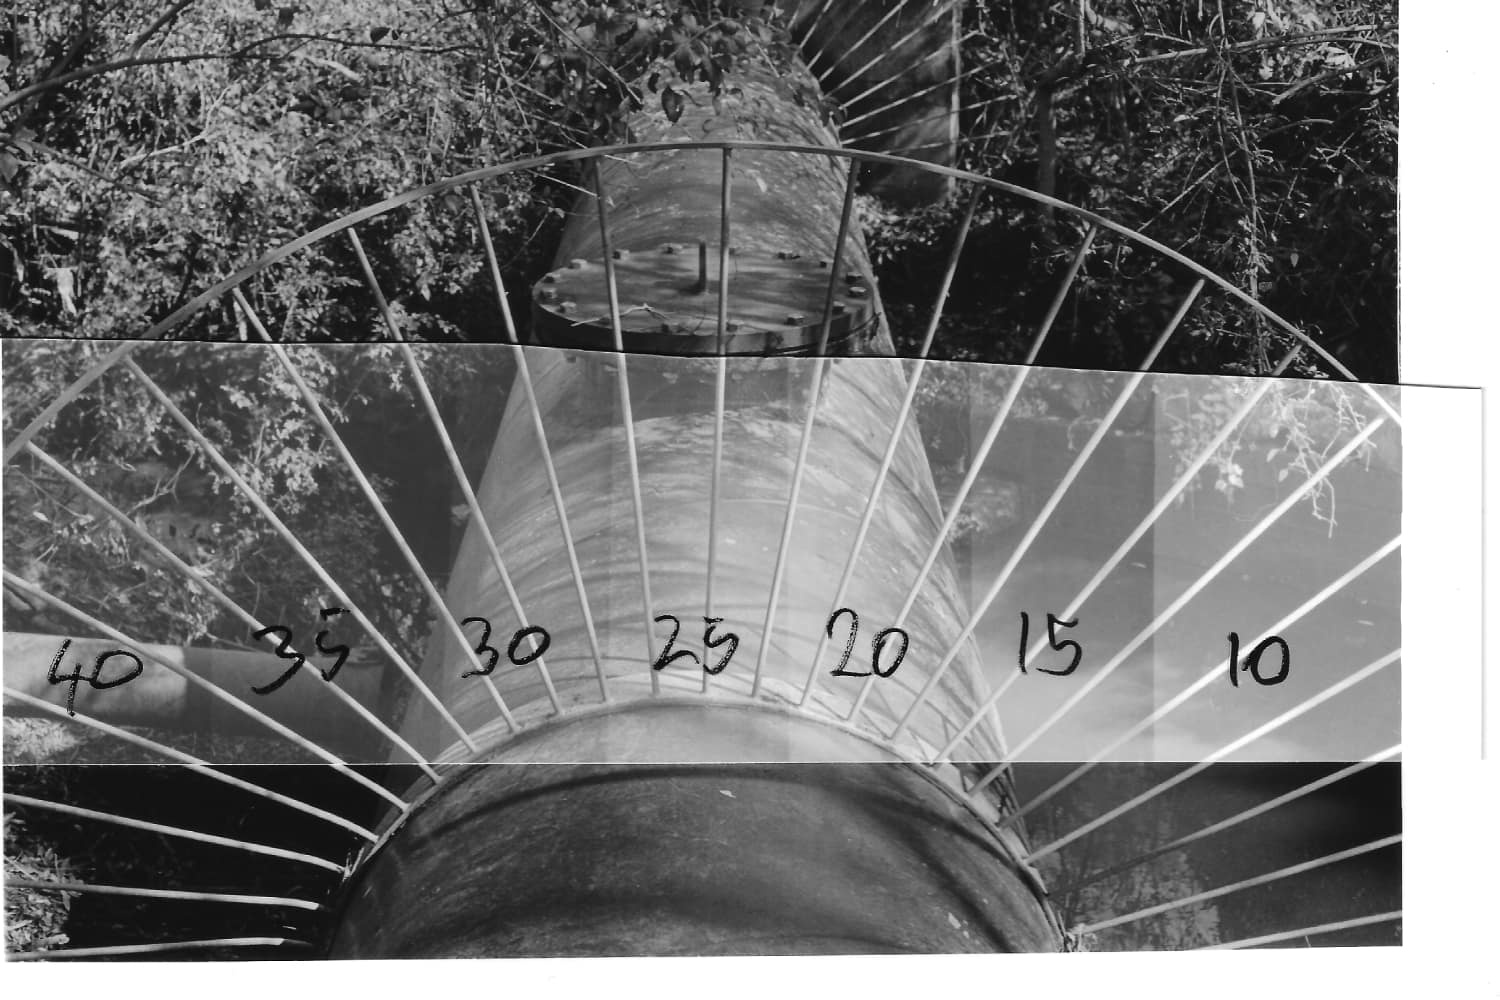
A test strip is printed so the light is held back in steps by using the opaque card. Each step is traditionally done using 5-second intervals making about 6 to 8 steps. This will give you a good starting point to determine the right exposure. (Yes, you will see the guys on YouTube do 3 second intervals, but they generally have wider apeetures so they can film what is going on.)
I was taught to always make an initial 5-second exposure of the entire strip first. Then place the card so only the first 1/6th of the card is exposed. Expose for 5 seconds and then move the card along to 2/6th position and repeat the process until you have uncovered the full strip. Develop, stop and fix the test strip as per normal.
Once fixed and given a quick rinse, turn the lights on and look at the test strip. Look for where the image appears to be correctly exposed. Now you count from the lightest counter across until you get the strip that is correctly exposed, times by 5 seconds and add 5 seconds for the initial exposure.
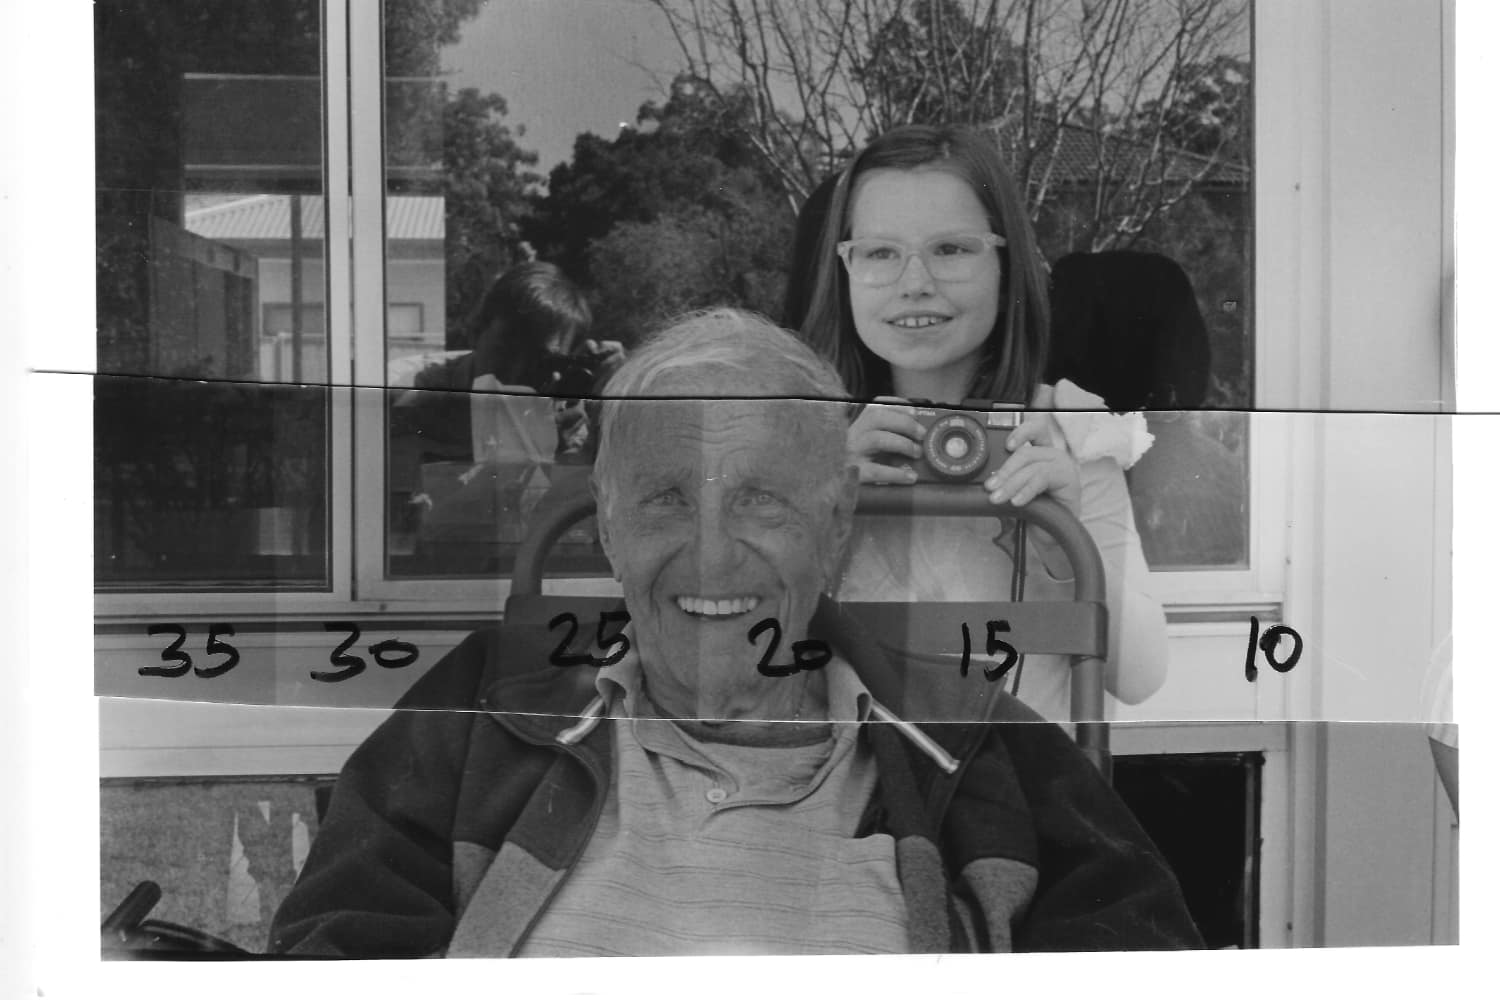
In the above example, we have a test strip with 6 steps. The trick is to select the area that represents good exposure, but we have a few candidates to choose from. The first is at the 15-second step for the skin tone on the girl's hand, 20-seconds mark for the detail in the shirt and 30 seconds for the detail on the window frame. This is typically the scenario you find yourself in when working out the correct exposure.
Given the issue around multiple candidate times, how do we start working it which one to use? Firstly, it should be the subject that takes precedence. Then determine if this will impact the overall feel and tonal range. If so, look at the next closest timing. Once you decide, it is time to do a full print at grade 2. (If you wonder why grade 2, it is the standard grade that gives a good balance between contrast and tone, and as such it is the one to start with when you are learning darkroom printing.)
What if the exposure is too light?
Sometimes, we make a test strip that is far too light. When the enlarger is new or the magnification is very different from the norm, then log-based intervals can be used, as in 5, 10, 20, 40 and 80 seconds. Now, you will have a large range of exposures to start to determine the correct exposure.
Once you get close, you then do a test strip around the selected time. For example, if the log-based test strip suggests around 40 seconds is close, you make the call to do a new test strip around that time. You do an initial exposure at 25 seconds and then 6 strips at 5-second intervals, giving you exposures 30, 35, 40, 45, 50, 55 seconds, allowing you to get very close to the correct time within two test strips.
When if the test strip is too dark?
If the exposed test strip is too dark, we simply close the aperture by one stop. Then, make another fixed interval test strip. Now develop and repeat the process of choosing the correct exposure for the print.
Finally
I would recommend that you keep your test strips. Write all the details on the test strip. I write the aperture, the scale number, as on the enlarger column and if I used a grade filter or not. One reason is I can skip having to start again when reprinting and also able to calculate new times for different magnifications.
I haven't discussed grades in this article. If you don't use any grade filters, then multi-grade can be assumed to be printed at grade 2. If you do decide to try multi-grade printing, I strongly recommend you use grade 2 filter from the start of the process, as it will make your life easier for calculating the other times.