Exposed to daylight
TROUBLE WITH MY LAB-BOX
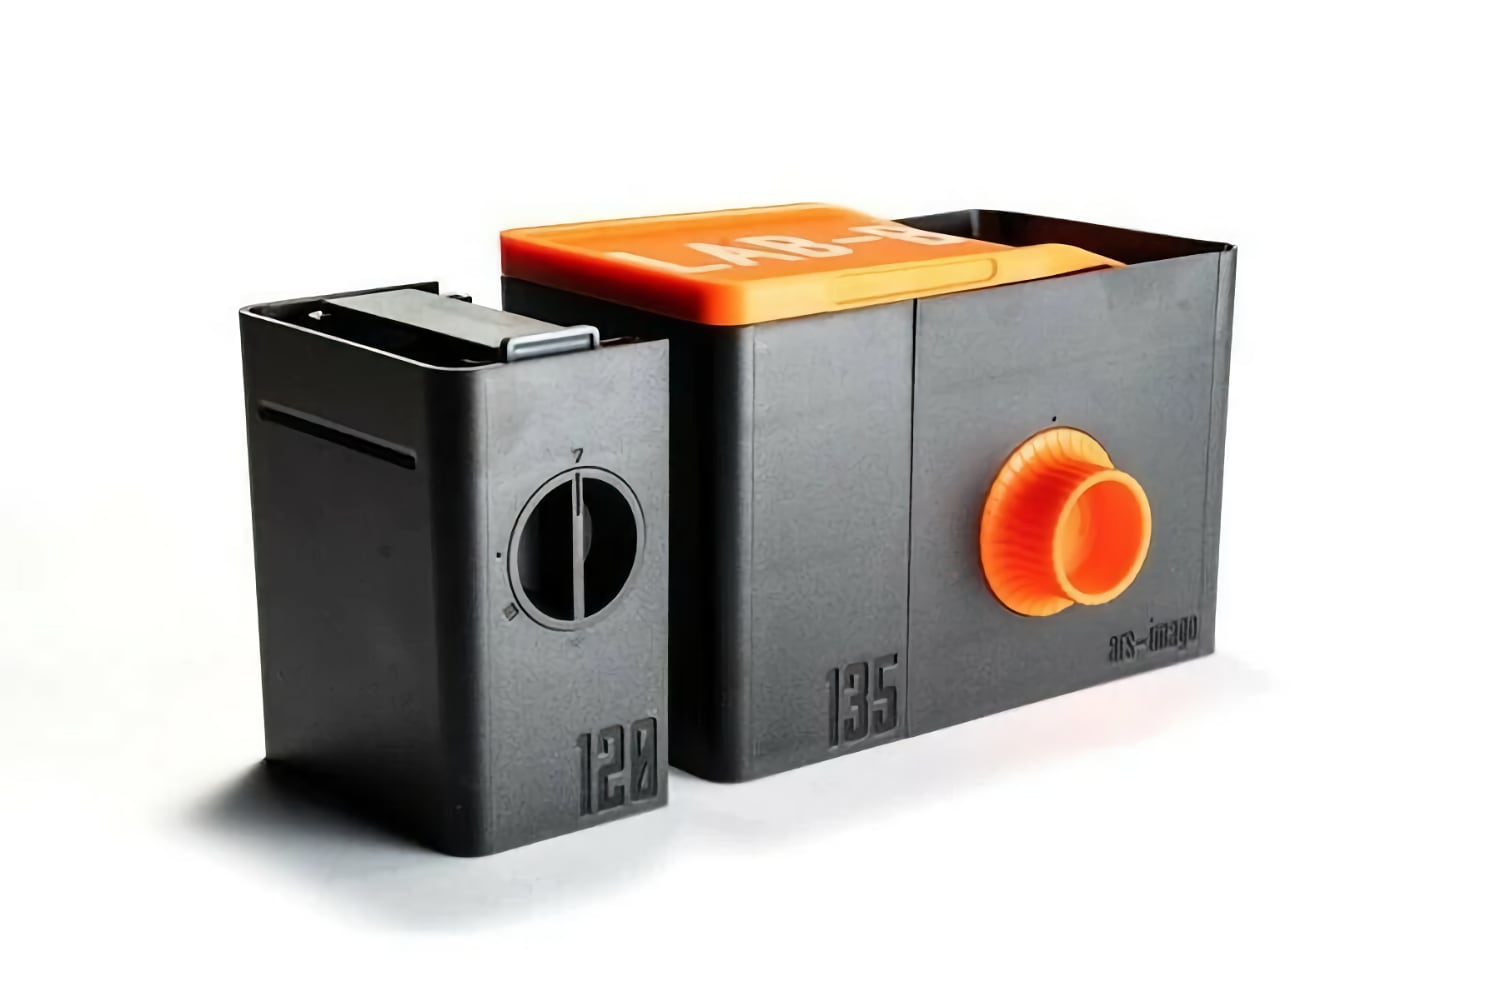
The Lab Box
It started so well
It now seems like a lifetime ago that we all saw the first glimpse of a film development tank that worked in daylight. Ars-imago launched their Kickstarter campaign for the Lab-Box to a great deal of excitement. They had no trouble reaching their target, and I, too, went along for the ride, for analogue photography was the trend to follow. Ok, I had already jumped back onto the film photography bandwagon a few years earlier, but without a darkroom, I had to rely on film labs to do the fun stuff.
We waited for the Lab-Box to arrive, and waited, and waited, and waited... I, like a lot of others, had almost given in on waiting any longer for it to be delivered. It was a bit unfair, as the manufacturing was more difficult than expected. Also, it turned out that injection moulding was a better option, requiring additional effort to put into the production process.
Finally, after Ars-imago resolved the manufacturing issues, the original backers got an Email stating that they will be soon shipping their Lab-Box. Mine arrived, and I was impressed with the way it looked. Yes, it could be called a copy of the Leitz Agfa Rondinax 35U Daylight Developing Tank (see Nick Clayton's artical at the Casual Photophile website.), and I would have to agree, but as an evolution, an improvement on that design. I had backed the option for the 35mm and 120 film loader modules, giving me flexibility beyond the Agfa design.
Initial Joy
Developing 35mm film has always required total darkness to get the film into the developing tank. This means that you need a darkroom or change bag. The Lab-Box was different. I clipped the film leader off to straighten the beginning of the film, clip it to the transport tape, put the lid on the Lab-Box and then wind the handle until I felt resistance. When you can't turn the handle any more, the film is loaded onto the spool. Then using the built-in blade cuts the end of the file away from the canister and another turn of the handle would complete the process. Simplicity!
Troubled times
I won't go into how you use the tank. The process to develop film in the Lab-Box is similar to developing film in a Paterson Tank. Yes, you crank a handle to agitate, but times and steps at the same. This article is not a "How To" article, as there are plenty of them online.
I enjoyed using the Lab-Box at first, and while I did make a few mistakes, I could develop film anywhere. That is, of course, the raison d'etre of daylight tanks. It is convenient to be able to process film almost anywhere without the need for a darkroom of a film change bag.
After putting a few rolls through the Lab-Box, I started to notice some strange marks on my film. Initially, I was blaming my camera for them, but as it then appeared on processed film on different cameras, I had to look for other causes. I then suspected my film squeegee as been the culprit, so I dripped dried a few rolls, but still, I saw scratches on the film processed through in the Lab-Box. I had been using my Paterson Tank for the majority of my film developing, and they had no scratches.
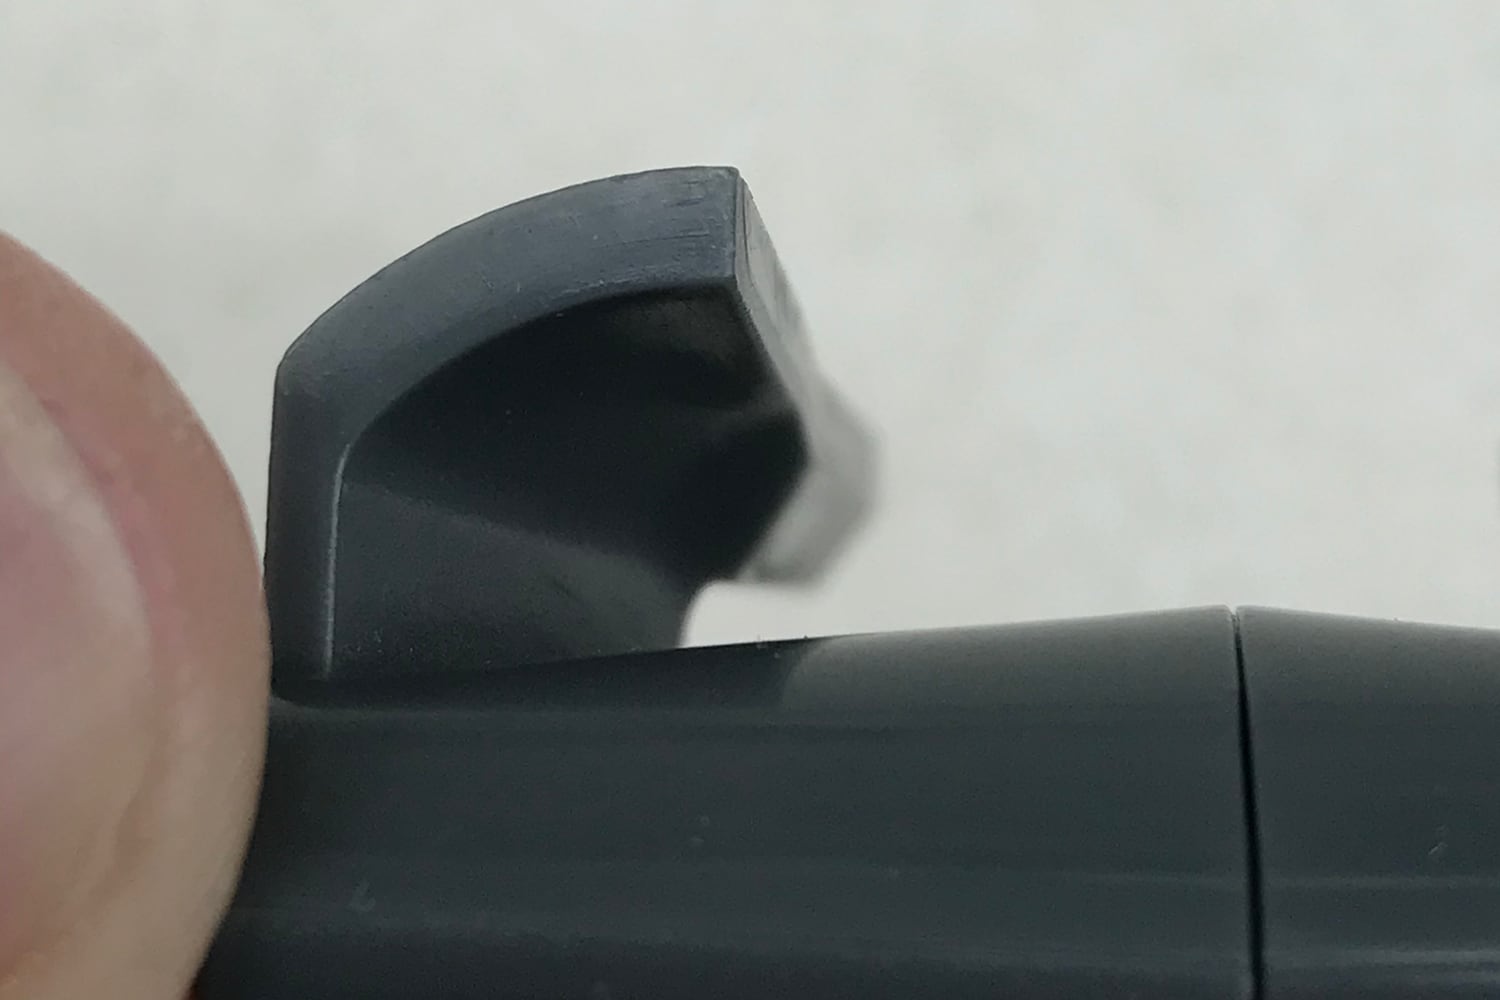
I had narrowed the problem down to the Lab-Box. Was it something I was doing incorrectly? I watched the How-To videos and ran more tests. Still, the scratches were there. I started to suspect the film cut blade, so I had started the take a close look at it. It did sometimes stick out into the film loading path a very small smidgin. I thought I had found the culprit in the form of the blade point and open it up to see why it didn't retract all the way.
The Lab-Box
The Blades
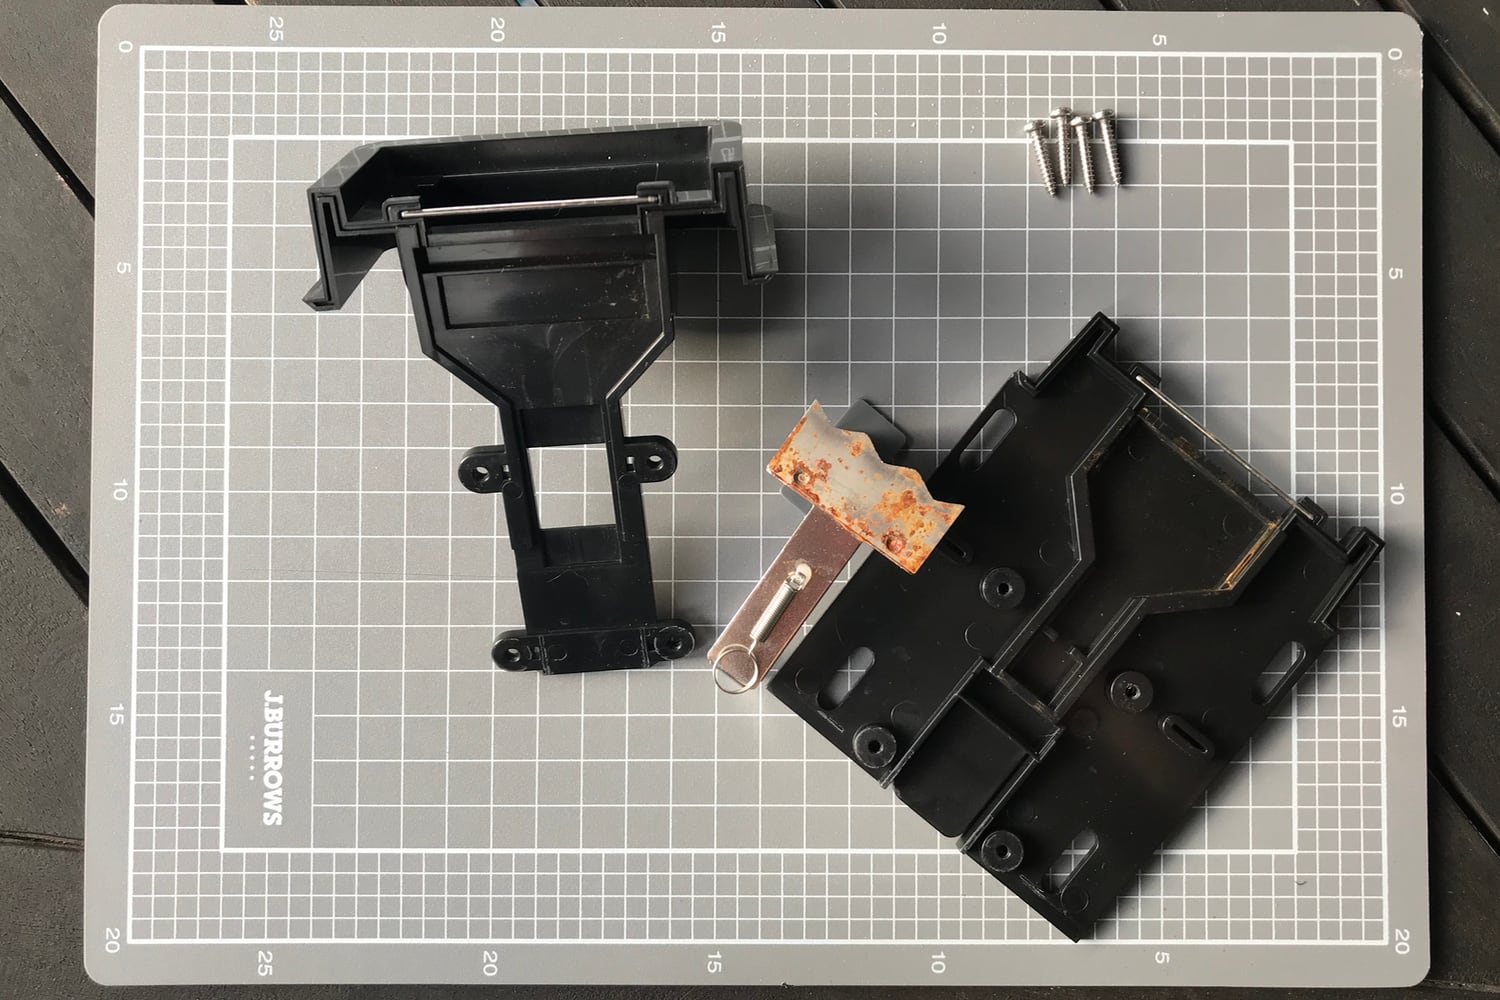
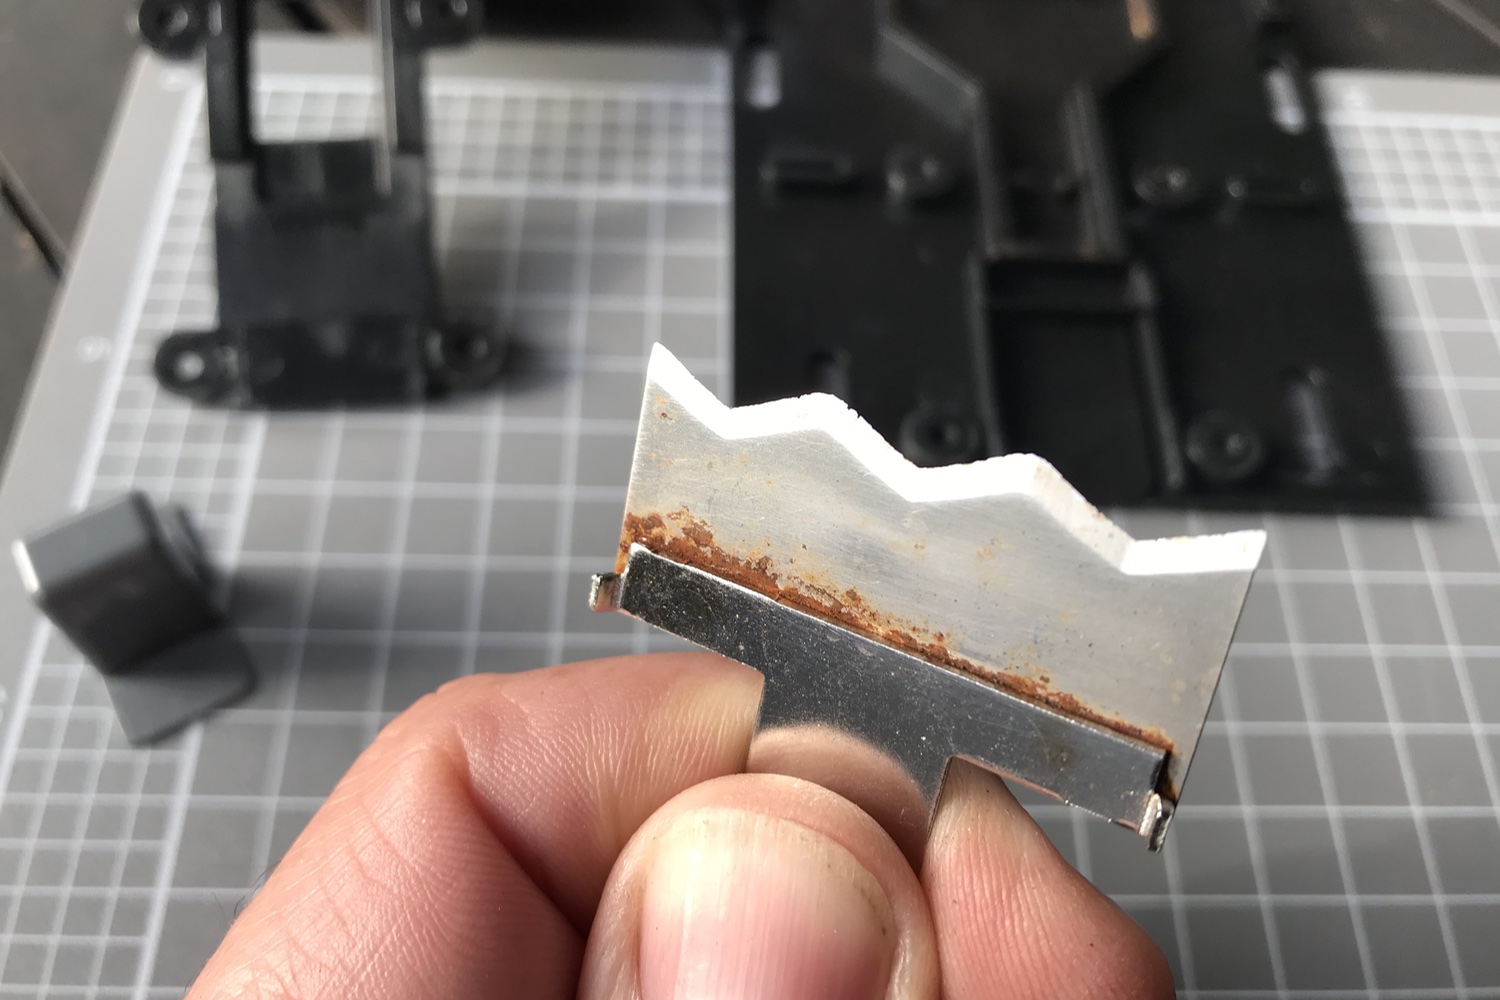
I was quite surprised when I saw the state of the blade. There was no excuse for the rust. I could not blame anyone else but me. While I had rinsed the unit well with water, it was clearly not enough. So, I set to repairing the damage caused by a few dozen films processed through it, and I hoped things were going to look up.
Final dribble
Drawing lines in the sand
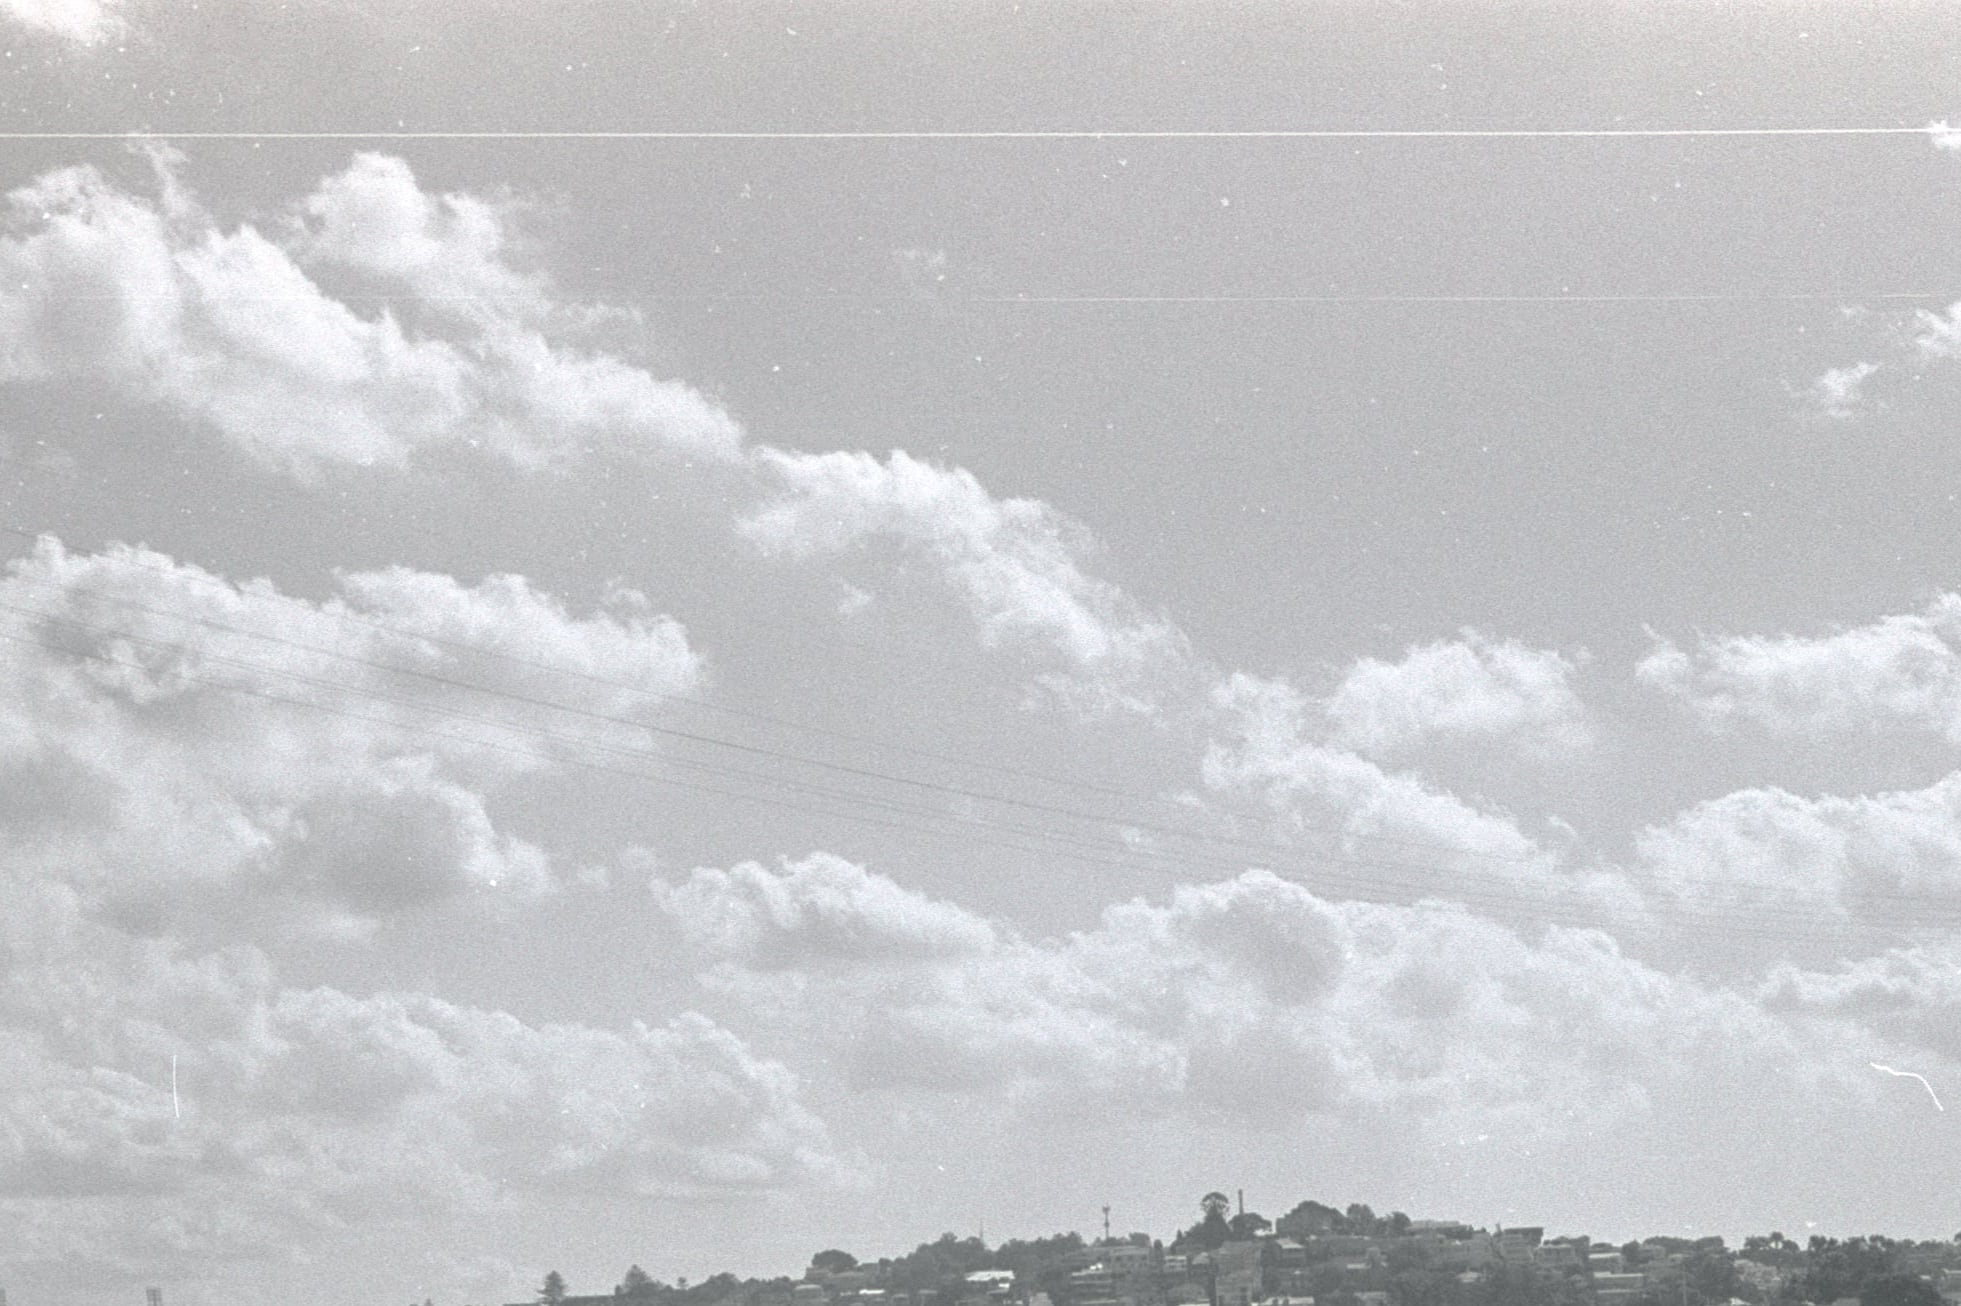
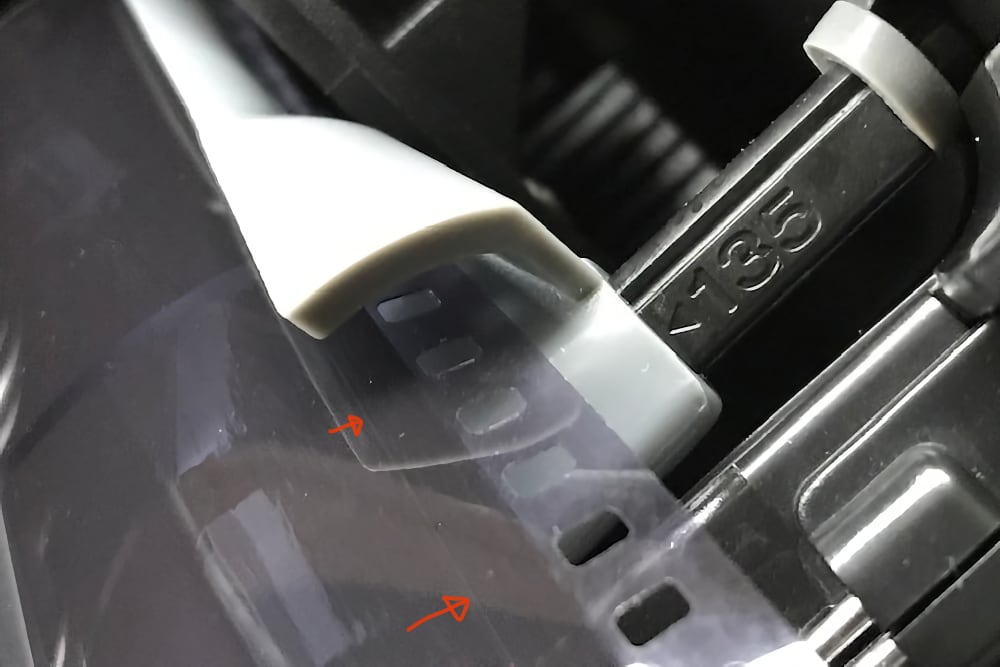
Another roll of film. and still there were scratches. Ok, firstly I better explain what I mean by scratches. The marks I was seeing of the negatives were lines lengthways, but not the entire length of the roll. They weren't deep, but they showed up in enlargements and scans very clearly. The final thing I discovered about the scratches was that they were on the non-emulsion side.
Finally, I had narrowed the issue down to the film feeder guide. I had an early model, and the edge was sharp. Not sharp enough to shave with, but sharp never the less. To be 100% sure, I put a short roll of unexposed film through the load process. I first checked the roll by pulling it out to see if there were any scratches on it. There were none. Then I followed my normal load process, bar I didn't put the lid on it. Yes, I was right! I had discovered the issue. It didn't happen the entire length of the film. and looking back through the rolls I had developed in the tank, I now know that some film brands are more susceptible to scratches.
The Lab-Box
Scratches on the film
Lab-Box Support
I did reach out to Ars-imago for some support. They helped with some suggestions while I was working out the problem. Once I suggested that it was the feeder they have informed me the Film Feeder Guide could not be the cause of the scratches and I have had no heard from them since. Oh, well I have been told!
Just to be clear, I am happy with the service I got from them, and they always got back with suggestions. Well, until they must have gotten annoyed with me.
Fixing the problem
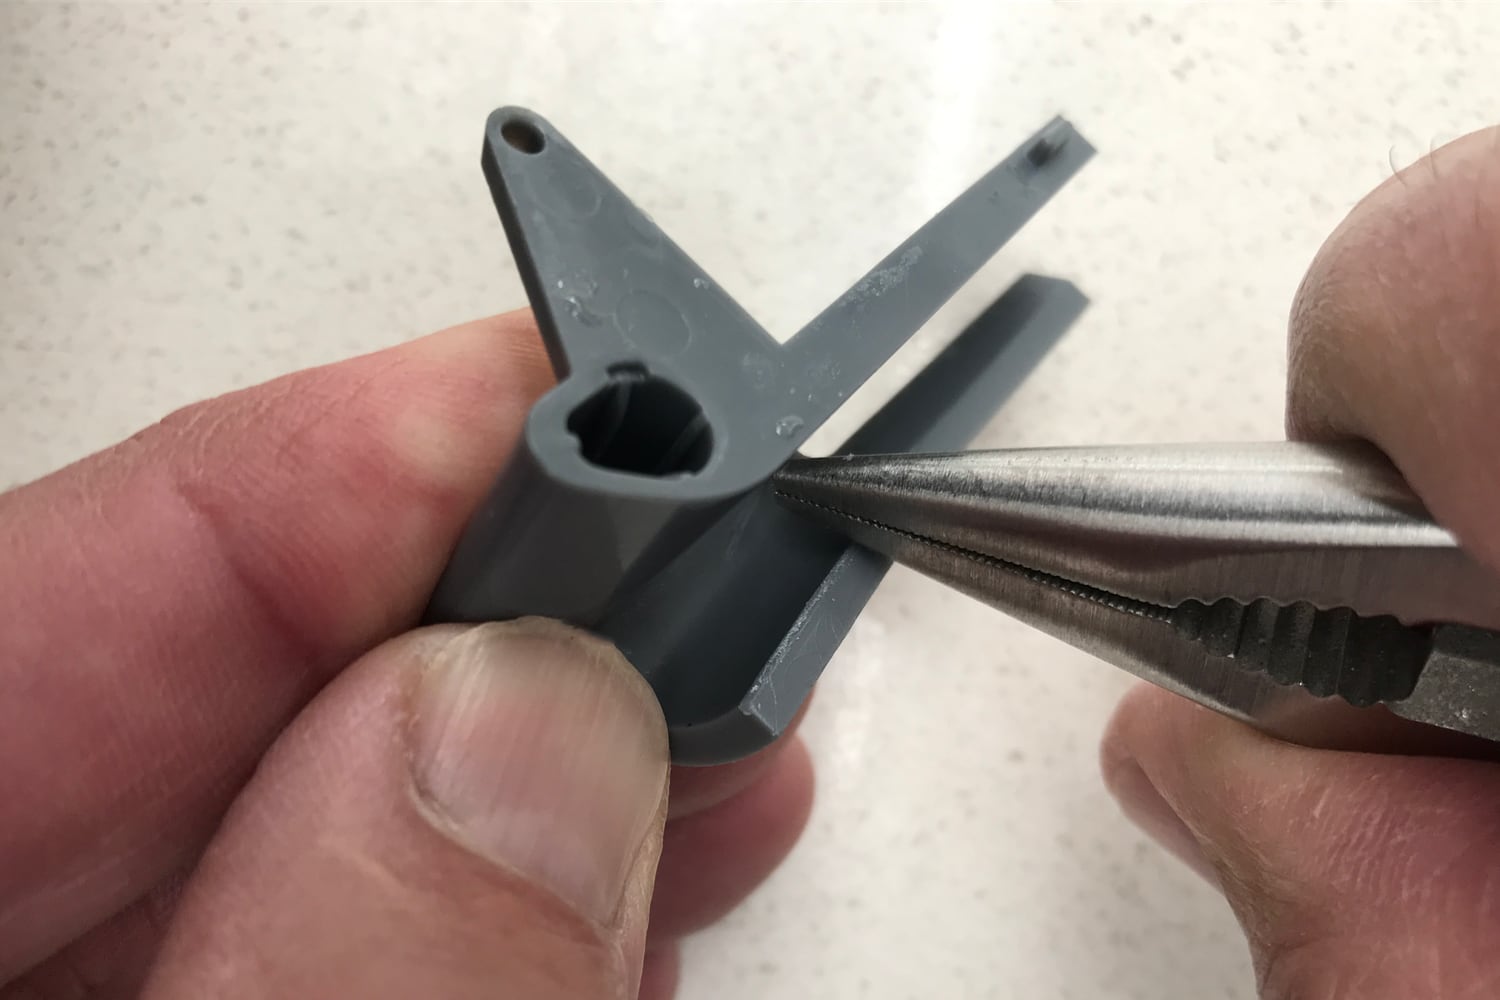
I was not giving up on the Lab-Box. I was determined to fix the feeder so that the sharp edges were no longer an issue. The feeder is an injected moulded plastic item, so I decided to be radical and tackle the sharpness of the two edges. I used the rounded part of my pliers. I gently rubbed each edge in the same direction the film is feed through. I also made sure I didn't make any burrs, and that it was very smooth.
The Lab-Box
Fixing the film guide
There was only one thing left to do. I tested it by developing several films through it. Success! I have now developed several rolls of film without a single scratch on any of them. I have no more concerns that Lab-Box will ruin my negatives.
Now that things are working, it is like I am falling in love with the Lab-Box properly. I take extra time soaking the 35mm unit in water and making sure I give it a thorough cleaning. I don't want more rust to form on the blade. I also slow down the loading in the film to be sure it is not my haste that causes any problems.
I will be taking Lab-Box away with me when I am staying at my mother-in-law's place in the country. I will also be using it as part of my Film Photography Experience that I run. It is now meeting my expectations as a convenient tool in my photographic arsenal.